
How to configure email clients and mobile devices for email hosted on Exchange
Firstly, if you use an email with Exchange and wish to configure (PC, Mac, mobile devices) with this article may set in a few minutes. This way you can work comfortably, sending and receiving emails from any device.
EXCHANGE 2013
OUTLOOK 2013
To begin, this article describes how to setup your Microsoft Exchange 2013 mailbox to work with your Microsoft Outlook 2013 email client.
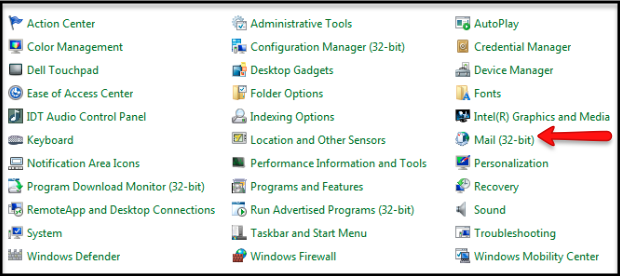
- Click the Windows Start button, select Control Panel, and then click Mail

- Please select Manually configure server settings or additional server types, and then click Next.

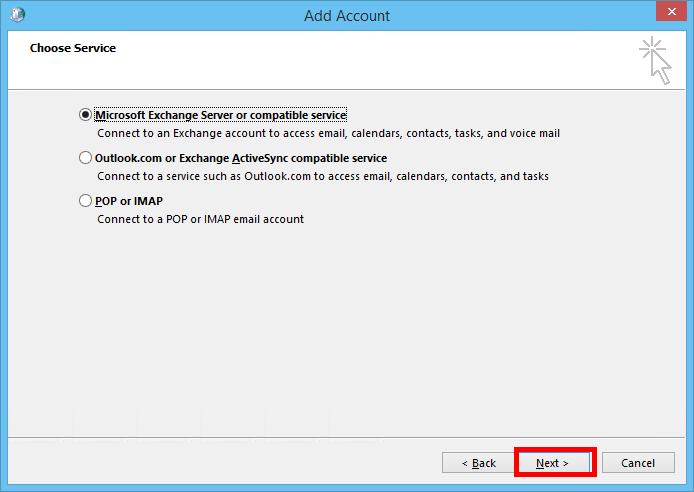
- Then, select Microsoft Exchange or compatible service, and then click Next.

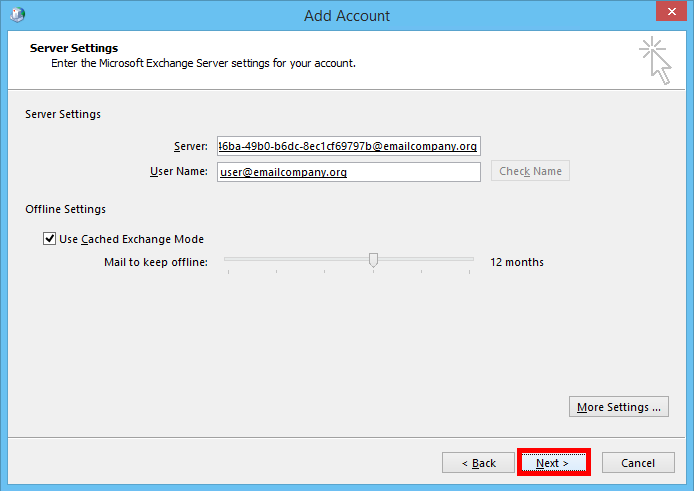
- On the Server Settings page, perform the following actions:
- In the Server text box, type outlook.
- Select the the Use Cached Exchange Mode check box.
- In the User Name text box, enter your entire email address.
- Click More Settings.

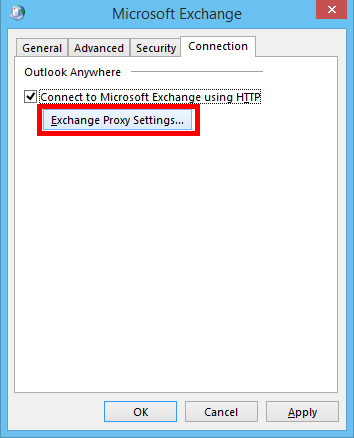
- In the Microsoft Exchange dialog box, click the Connection tab and select the Connect to Microsoft Exchange using HTTP check box. Then click Exchange Proxy Settings.

- In the Microsoft Exchange Proxy Settings dialog box, perform the following actions:
- In the Use this URL to connect to my proxy server for Exchange text box, enter mex06.emailsrvr.com.
- Select both the On fast networks and On slow networks check boxes.
- Under Proxy authentication settings, select Basic Authentication.
- Click OK

- In the Microsoft Exchange dialog box, click Apply and then click OK.
- On the Server Settings page, click Check Name, type your password, and then click OK.Your name will then be highlighted and a line will appear under the User Name field, indicating that your profile has been configured.
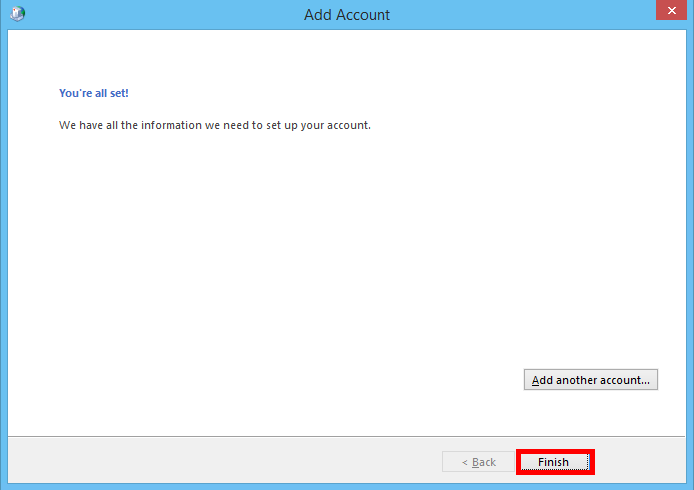
- Click Next. On the next page, click Finish.

- Open Outlook to select your new Exchange profile.

You have successfully added your Exchange email account on your Windows device.
MAIL MAC
- Launch System Preferences. You can easily get to System Preferences by pressing «Command (⌘) + Space Bar«. Then type «System Preferences» in the Spotlight search. Press enter to launch the System Preferences application.
- Within System Preferences, click «Internet Accounts«. Then select «Exchange«.

- The pop up dialog will require the following:
- «Name«: Enter your first and last name.
- «Email Address«: Your account mail
- «Password«: Enter your mailbox password.

- Select «Continue«.
- If «Internal URL» and «External URL» appears, enter «https://mex09.emailsrvr.com/EWS/Exchange.asmx» (without quotes) in both Internal URL and External URL. Then click the «Continue» button once more.

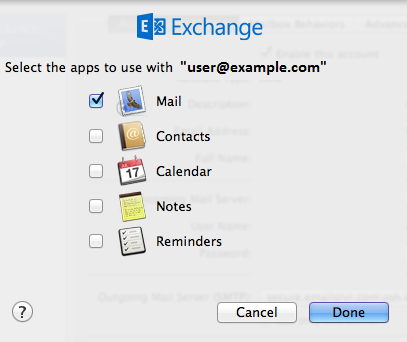
- Select «Continue» once more. Then select the apps you would like to sync with Exchange.

- Select «Done«.
- Finally, launch Mail. Your email should begin downloading shortly.
You have successfully added your Exchange email account on your Mac Os.
IPOD, IPAD, IPHONE
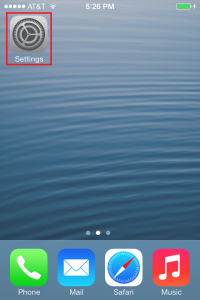
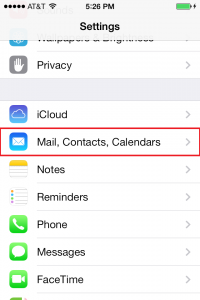
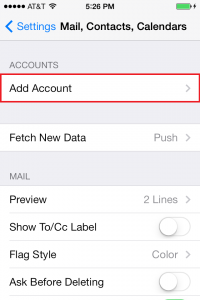
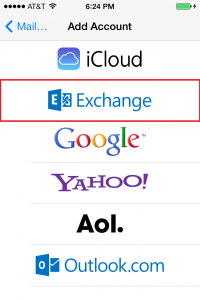
On the home screen of your device, tap Settings > Mail, Contacts, Calendars > Add Account.


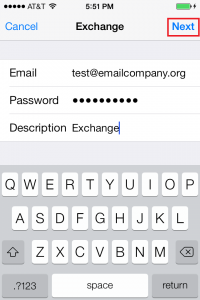
- Tap Exchange and enter your email address , password, and an optional description. Tap Next.

- Make your selections and tap Save.

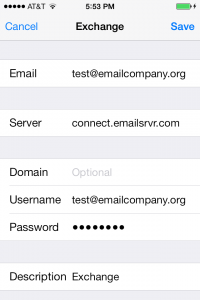
- On the server settings page, tap the Server field and enter mex06.emailsrvr.com. Leave the Domain field blank. Then click Next.

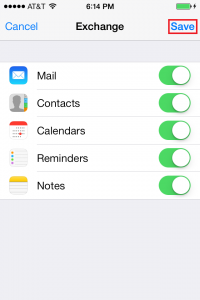
- Select the services that you want to synchronize from the Exchange server. Then tap Save.
 You have successfully added your Exchange email account on your iOS device.
ANDROID
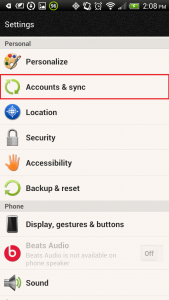
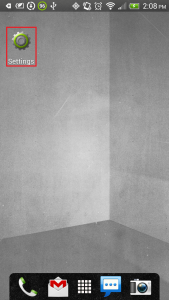
- On your device, tap on the system Settings icon.

- Tap Accounts & sync (Accounts on some devices).

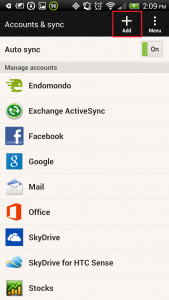
- Tap Add.

- Select Exchange ActiveSync (Microsoft Exchange ActiveSync on some devices).

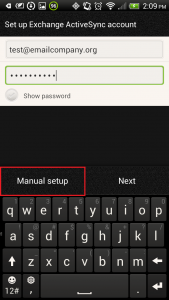
- Enter your email address and password, and then tap Manual setup.

- On the next page, enter the rest of the necessary information, and then tap Next.
Email address: Your email address (for example, test@emailcompany.org)
Server address: mex06.emailsrvr.com
Domain: Leave this field blank.
Username: Your email address again.
Some devices might combine the domain and username the settings as domain\username. On those devices, precede your email address with a backslash (for example, \test@emailcompany.org).
Password: Password for you email address.
Select This server requires an encrypted SSL connection.
- If you are prompted to enable remote security administration, tap OK or Allow. This setting enables you to remotely perform a factory reset (delete all data) on the device from the Outlook Web App (OWA) if the device is lost or stolen.
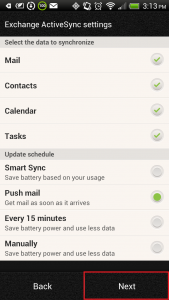
- Select the services that you want to synchronize with the Exchange server, and specify how often you want to synchronize. Then, tap Next.

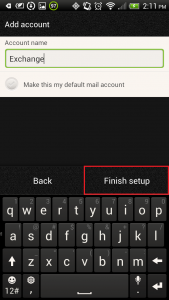
- Enter a descriptive name for your account, and then tap Finish setup.

WINDOWS PHONE
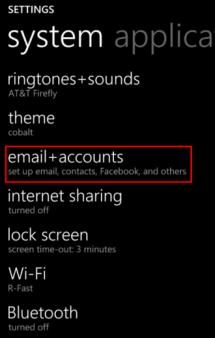
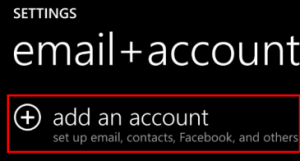
- Locate the Settings options from within your application menu.

- Choose Email + Accounts.
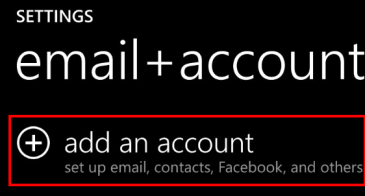
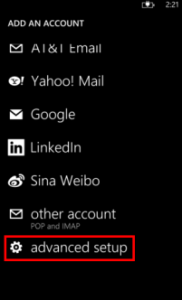
- Tap Add an Account.
- Select the option for Advanced Setup.

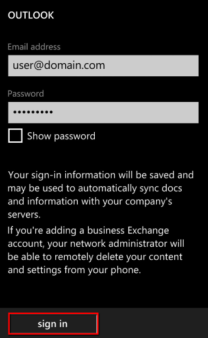
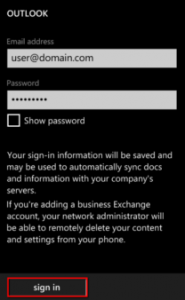
- Enter your full email address and password for your account, then press the sign in button.
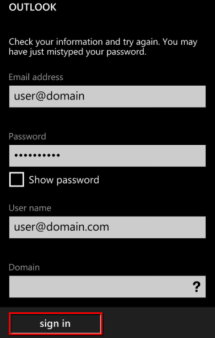
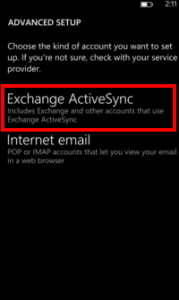
- Select Exchange ActiveSync.

- Ensure your email address remains correct. Leave the Domain field blank and enter the following address for Server: mex06.emailsrvr.com

- Select the sign in button. Once connected, you will see a new icon within your settings menu with the name of your new email account.

EXCHANGE 2010
OUTLOOK
- Click the Windows Start button, select Control Panel, and then click Mail (32-bit).
- Click Show Profiles, click Add, enter a name for this profile, and then select OK
- Please, select Manually configure server settings or additional server types, and then click Next.

- Choose Microsoft Exchange or compatible service, and then click Next.
- Then, perform the following actions:
In the Server text box, type outlook.
Select the the Use Cached Exchange Mode check box.
In the User Name text box, enter your entire email address.
Click More Settings. - In the Microsoft Exchange dialog box, click the Connection tab and select the Connect to Microsoft Exchange using HTTP check box. Then click Exchange Proxy Settings.
- In the Microsoft Exchange Proxy Settings dialog box, perform the following actions:
In the Use this URL to connect to my proxy server for Exchange text box, enter mex06.emailsrvr.com.
Select both the On fast networks and On slow networks check boxes.
Under Proxy authentication settings, select Basic Authentication.
Click OK.
- In the Microsoft Exchange dialog box, click Apply and then click OK.
- On the Server Settings page, click Check Name, type your password, and then click OK.
- Click Next. On the next page, click Finish.
- Open Outlook to select your new Exchange profile.
MAIL MAC
- Open Mac Mail and select Mail > Preferences.
- In the new window that appears, click the Accounts tab in the top menu bar and then click the plus (+) symbol in the lower-left corner.
- Select Exchange and then click Continue.

- On the next page, enter your full name and your entire Microsoft Exchange email address and password. Then click Continue.
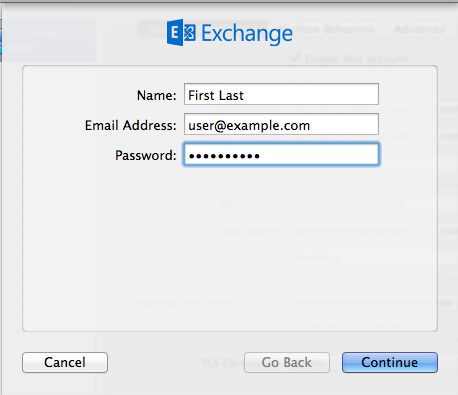
If your Autodiscover CNAME record is set correctly, Mail automatically pulls the correct server settings for you. Skip to Step 6.
If the Autodiscover CNAME record is not set correctly, you can set up the account manually. Continue to Step 5. - Enter the following information and then click Continue:Description – Enter a descriptive name for your mail account (for example, Work Mail).
User Name – Enter your entire email address (for example, user@example.com).
Password – Enter the password associated with the email account you are setting up.
Server Address – Enter connect.emailsrvr.com.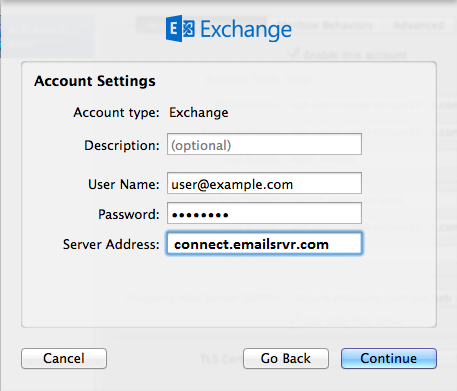
- Confirm the settings and then click Continue.
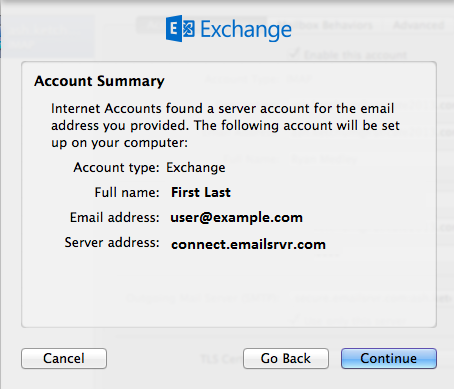
- Choose any other options that you want to enable, and then click Done.
 Your Microsoft Exchange 2010 email account is now set up with Mac Mail.
IPAD, IPOD, IPHONE
- On the home screen of your phone, tap Settings.
- Tap Mail, Contacts, Calendars.
- Add Account.
- Tap Exchange.
- Enter your email address and password, and add a description of the account you are setting up. Then, tap Next.
- On the server settings page, enter the following information if it is not already present:
- Email – Enter your email address.
- Server – Enter connect.emailsrvr.com.
- Domain – Leave this field blank.
- Username – Verify that your user name is exactly the same as your full email address.
- Password – Enter your email account password.
- Description – Enter a description of the account that you are setting up. This can be anything that helps you identify your account.
- Tap Save.
- Tap Next.
- Your device creates a secure (SSL) connection to the Exchange server. When the device is connected, check marks appear confirming that your settings have been verified.
- Select the services that you want to sync with the Exchange Server by swiping the ON/OFF buttons next to each service. Tap Save when you are done.
ANDROID
- Tap the Settings icon, and then tap Accounts and Sync.
- Tap the Add icon, and then tap Exchange ActiveSync.

- Enter your email address and password, and then tap Manual setup.
- On the next page, enter the rest of the necessary information and then tap Next:
- Email address: Enter your email address (for example, test@example.org).
- Server address: Enter connect.emailsrvr.com.
- Domain: Leave this field blank.
- Username: Enter your email address again.
- Some devices might have the settings as domain\username. On those devices, the field should have a backslash (\) before your email address (for example, \test@example.org).
- Password: Enter your password.
Select This server requires an encrypted SSL connection.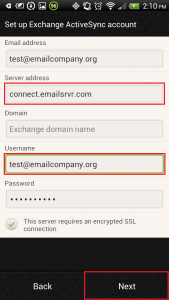
- If you are prompted to enable remote security administration, tap Ok or Allow. This allows you to remotely perform a factory reset (delete all data) on the device from Outlook Web App if the phone is lost or stolen and there is sensitive company information on the device.
- Select the services that you want to synchronize with the Exchange server and when to synchronize. Then, tap Next.
- Enter a descriptive name for your account and then tap Finish setup.
Your Android phone and Microsoft Exchange account are now synchronized.
WINDOWS PHONE
- Locate the Settings options from within your application menu.
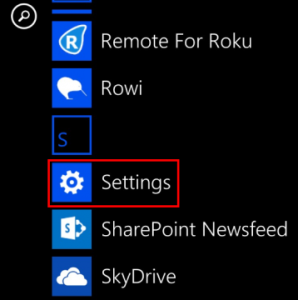
- Tap Email + Accounts.

- Select Add an Account.
- Choose the option for Advanced Setup.
- Enter your full email address and password for your account. Then press the sign in button.
- Then, please select Exchange ActiveSync. Ensure your email address remains correct.
- Also leave the Domain field blank. Enter the following address for Server: connect.emailsrvr.com.
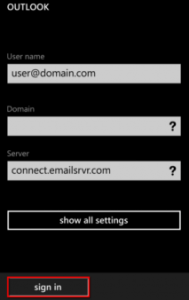
- Consequently, select the sign in button. Once connected, you will see a new icon within your settings menu with the name of your new email account.
